Sunday, October 18, 2026

How to Decode Salt and Sugar Information on Food Labels

A vibrant display of Tabasco sauce bottle surrounded by fresh chili peppers against a dark backdrop.

Understanding what appears on a food package can feel overwhelming. Two of the most common concerns are salt and sugar. Both affect taste, health, and daily intake goals. By learning how to read the label, you can make smarter choices without guessing.

Where to Find Salt and Sugar on the Label

The Nutrition Facts panel is the first place to look. Salt appears as "Sodium" measured in milligrams (mg). Sugar is listed under "Total Carbohydrate" as "Total Sugars" and sometimes broken down into "Added Sugars." Both numbers are presented per serving, so you must compare them to the serving size.

Below the panel, the ingredient list offers clues about hidden sources. Ingredients are listed in descending order by weight. If "sugar," "high‑fructose corn syrup," "sucrose," or "salt" appear near the top, the product contains a large amount of that component.

Understanding Daily Values and Limits

In the United States, the Daily Value (DV) for sodium is 2,300 mg. For added sugars, the DV is 50 g for a 2,000‑calorie diet. The label shows the percentage of DV (%DV) next to each nutrient. A %DV of 5 % or less is considered low, while 20 % or more is high.

Use these percentages to gauge how a single serving fits into your daily plan. For example, a snack with 300 mg sodium provides about 13 % of the DV, which is moderate. A soda with 40 g of added sugar supplies 80 % of the DV, indicating a high sugar load.

Portion Size Matters

Manufacturers often list a small serving size to keep numbers low. If you eat more than the stated serving, multiply the values accordingly. A granola bar that lists 150 mg sodium per half‑bar becomes 300 mg if you eat the whole bar.

Check the package for a "servings per container" line. This helps you calculate the total amount you will consume. Adjusting portion size can dramatically lower your intake of both salt and sugar.

Tips for Reducing Salt and Sugar Intake

1. Choose products with "no added sugar" or "unsweetened" labels. These often contain only natural sugars from fruit or dairy.

2. Look for "low‑sodium" or "reduced‑sodium" claims. In the U.S., low‑sodium means 140 mg or less per serving, and reduced‑sodium indicates at least a 25 % reduction compared to the regular version.

3. Compare similar items side by side. Two brands of canned beans may have different sodium levels. Selecting the lower‑sodium option saves you up to 400 mg per serving.

4. Use spices, herbs, and citrus instead of salt for flavor. This can cut sodium without sacrificing taste.

5. Read the ingredient list for hidden sugars. Words like "maltodextrin," "fruit juice concentrate," and "evaporated cane juice" all add sugar.

Making the Label Work for You

Take a few seconds to scan the Nutrition Facts panel before you buy. Note the sodium and total sugar numbers, then compare the %DV to your personal goals. If the numbers are high, consider an alternative product or a smaller portion.

Over time, you will develop a sense of what amounts feel reasonable. This skill helps you stay within recommended limits without counting every milligram.

Remember that occasional indulgence is fine. The goal is to keep average daily intake within the recommended ranges. By consistently checking labels, you empower yourself to make choices that support long‑term health.

Related reading

AI disclosure: this article was automatically drafted with AI assistance and reviewed before publishing. Written with AI assistance: openai/gpt-oss-120b. It is general information, not professional medical, financial or legal advice.


Staying Active When Your Motivation Fades

A person jogging in silhouette during sunrise on a foggy morning in a serene park setting.

Motivation is a fickle friend. One day you feel unstoppable, the next you struggle to lace up your shoes. The good news is that exercise does not have to rely on constant enthusiasm. By building reliable habits, adjusting expectations, and using simple mental tricks, you can keep moving even when the spark dims.

Set Clear, Small Goals

Big ambitions often feel overwhelming. Break them into bite‑size targets that you can achieve in minutes. Instead of promising a 60‑minute run, commit to a 10‑minute walk or a set of 20 body‑weight squats. Small wins create a sense of progress and reinforce the habit loop: cue, routine, reward. When the routine is easy to start, the cue—whether a morning alarm or a calendar reminder—triggers action without demanding high motivation.

Write your micro‑goals in a visible place. A sticky note on the fridge or a phone widget can serve as a constant prompt. Checking off each item releases dopamine, which subtly boosts your desire to repeat the behavior.

Design an Environment That Nudges You

Physical surroundings shape behavior more than willpower. Keep workout gear where you can see it: lay out your sneakers, yoga mat, or dumbbells the night before. If you notice the equipment, the brain registers a visual cue and prepares the body for movement.

Remove friction from the process. Choose a route that requires no parking, or pick a streaming class that starts with a single click. The fewer steps between intention and action, the less chance you have to abandon the plan.

Use Variety to Counter Boredom

Repeating the same routine can drain excitement quickly. Mix up activities every week to keep the brain engaged. Swap a jog for a bike ride, try a short HIIT circuit, or follow a dance video. Variety provides new sensory input, which can reignite interest without demanding extra effort.

Even small changes—like listening to a different playlist or exercising outdoors—alter the experience enough to feel fresh. Schedule a “fun day” each month where you try something completely new, such as rock climbing or a group sport.

Leverage Social Accountability

Sharing your plan with a friend or joining a small group adds a layer of responsibility. When someone else expects you to show up, you are more likely to follow through. Use messaging apps to set up quick check‑ins or create a shared calendar for workout slots.

If you prefer low‑pressure interaction, post a brief update on a fitness forum or social media. The act of documenting progress can serve as a public commitment, nudging you to stay consistent.

Focus on Process, Not Outcome

When motivation wanes, the temptation is to judge yourself by results—weight loss, speed, or distance. Shift the focus to the act of moving itself. Notice how your breath feels, how your muscles engage, or how your posture improves. This internal feedback provides immediate reward, independent of long‑term goals.

Write a short journal entry after each session describing what you felt. Over time, these notes become a record of consistency, reinforcing the habit even on low‑energy days.

Plan for Low‑Motivation Days

Accept that some days will feel harder than others. Prepare a “fallback” routine that requires minimal effort, such as a 5‑minute stretch or a quick walk around the block. Completing even a tiny amount signals to your brain that the habit is intact, making it easier to resume a fuller workout later.

Pair the fallback activity with a pleasant reward—perhaps a favorite tea or a short podcast episode. The reward creates a positive association, encouraging you to repeat the pattern when motivation returns.

Track Progress in Simple Ways

Data can motivate, but it should stay simple. Use a calendar to mark days you exercised, or a basic spreadsheet to log minutes and type of activity. Visual streaks provide a clear picture of consistency and can be more motivating than complex metrics.

A streak of ten days, for example, feels rewarding enough to protect. When you see a gap, you are more likely to fill it quickly to preserve the chain.

Conclusion

Motivation will ebb and flow, but a well‑designed system can keep you moving regardless. By setting tiny goals, shaping your environment, adding variety, involving others, and celebrating the process, you create a resilient routine. On the toughest days, remember that a short, easy activity is better than none at all. Consistency, not intensity, builds lasting fitness habits that survive the inevitable dips in enthusiasm.

Related reading

AI disclosure: this article was automatically drafted with AI assistance and reviewed before publishing. Written with AI assistance: openai/gpt-oss-120b. It is general information, not professional medical, financial or legal advice.

How Much Fiber You Need and the Best Food Sources

Close-up of assorted raw grains including buckwheat, rice, and oats, highlighting healthy food choices.

Fiber is a type of carbohydrate that your body cannot digest. It passes through the digestive system, helping to keep things moving and supporting gut health. Knowing how much fiber you need and where to get it can make a big difference in your daily nutrition.

Recommended Daily Intake

Guidelines from health agencies suggest that adult women aim for about 25 grams of fiber per day, while adult men should target around 38 grams. These numbers are based on a 2,000‑calorie diet for women and a 2,500‑calorie diet for men. If you eat fewer calories, you may need slightly less fiber, but most people benefit from staying close to these targets.

Older adults often need less fiber because their calorie needs drop, but they should still aim for at least 21 grams for women and 30 grams for men. Pregnant or breastfeeding women may need a bit more, roughly 28 grams, to support both their own health and that of their baby.

Why Fiber Matters

Fiber helps regulate bowel movements, preventing constipation and promoting regularity. It also feeds beneficial bacteria in the colon, which produce short‑chain fatty acids that support the immune system. Soluble fiber, found in oats and beans, can slow glucose absorption, helping to keep blood sugar levels stable. Insoluble fiber, found in wheat bran and vegetables, adds bulk to stool and speeds up waste removal.

While research links higher fiber intake to lower risk of heart disease and certain cancers, these benefits are observed over long periods and in populations that consistently meet or exceed recommendations. Individual results can vary, and fiber alone does not guarantee health outcomes.

Top Food Sources of Fiber

Below is a list of common foods and the amount of fiber they provide per typical serving. Choose a variety of these items to reach your daily goal.

  • 1 cup cooked lentils – 15.6 g
  • 1 medium apple with skin – 4.4 g
  • 1 cup cooked quinoa – 5.2 g
  • 1 slice whole‑grain bread – 2.0 g
  • 1 cup raw broccoli – 2.4 g
  • 1/2 cup cooked black beans – 7.5 g
  • 1 ounce almonds – 3.5 g
  • 1 cup raspberries – 8.0 g
  • 1 medium sweet potato with skin – 3.8 g
  • 1 cup oatmeal (dry) – 10.0 g

Whole grains, legumes, fruits, vegetables, nuts, and seeds are the richest sources. Processed foods often lose fiber during refining, so choose the least processed options whenever possible.

Tips for Adding More Fiber to Your Diet

Start your day with a bowl of oatmeal topped with berries and a sprinkle of nuts. Swap white rice for brown rice or quinoa at lunch. Add a handful of beans to salads, soups, or tacos. Snack on raw vegetables with hummus instead of chips. When you bake, replace part of the flour with whole‑grain flour or oat bran.

Increase fiber gradually to avoid gas or bloating. Drink plenty of water, as fiber absorbs liquid and moves more easily through the gut. Aim for at least eight glasses of water a day, especially if you add a lot of fiber quickly.

Reading nutrition labels can help you track intake. Look for foods that list at least 3 grams of fiber per serving, which qualifies as a “good source.” If a product claims “high fiber,” it should contain 5 grams or more per serving.

Remember that cooking can change fiber content slightly. Steaming vegetables retains most of their fiber, while boiling may cause some loss into the water. When possible, use cooking methods that preserve the food’s natural structure.

By planning meals that include a mix of soluble and insoluble fiber, you can meet the recommended amounts without feeling overwhelmed. Small, consistent changes add up, and the variety keeps meals interesting.

Monitoring Your Fiber Intake

Keep a simple food diary for a week. Write down each meal and snack, then add up the fiber grams using the nutrition facts on packages or a reliable online database. Compare the total to the recommended amount for your age and sex.

If you consistently fall short, consider a fiber supplement such as psyllium husk. Use supplements only as a short‑term aid, and choose products with minimal added sugars or artificial ingredients.

Overall, meeting your fiber needs is a matter of choosing whole, plant‑based foods regularly. The effort pays off with smoother digestion, better blood‑sugar control, and a healthier gut environment.

Related reading

AI disclosure: this article was automatically drafted with AI assistance and reviewed before publishing. Written with AI assistance: openai/gpt-oss-120b. It is general information, not professional medical, financial or legal advice.

Shoulder Stretches to Relieve Tension After Long Meetings

An athletic man stretching his arm in a gym, showcasing strength and flexibility.

Many professionals spend hours in front of a screen, sitting upright, and holding a phone between ear and shoulder. When a meeting runs long, the shoulders often become tight, sore, and less mobile. Simple stretches can restore range of motion, reduce discomfort, and improve posture for the rest of the day.

Why Shoulders Tighten During Meetings

During a typical video call, people tend to hunch forward, pull the shoulders toward the ears, and keep the neck in a static position. This posture shortens the upper trapezius and levator scapulae muscles. Over time, these muscles develop tension, which can radiate down the arms and cause headaches.

In addition, many participants keep a phone pressed against the ear while typing notes. The weight of the device adds extra load to the shoulder girdle. Even brief periods of this habit, repeated throughout a day, accumulate stress.

Four Easy Stretches You Can Do at Your Desk

1. Neck Release with Shoulder Drop – Sit tall, let the right ear move toward the right shoulder. Use the left hand to gently pull the left shoulder down toward the floor. Hold for 15 seconds, then switch sides. This stretch loosens the upper traps and the side of the neck.

2. Cross‑Body Arm Stretch – Extend the right arm straight across the chest. Use the left hand to press the right elbow toward the body, feeling a stretch in the back of the shoulder. Hold for 20 seconds, then repeat with the left arm. The movement opens the posterior deltoid and rhomboid area.

3. Doorway Chest Opener – Stand in a doorway, place forearms on the frame at shoulder height, and step forward gently. The chest opens while the shoulders roll back. Keep the stretch for 20‑30 seconds. This counteracts the forward‑rounded posture common in meetings.

4. Seated Scapular Retraction – Sit upright, pull the shoulder blades together, and hold for five seconds. Release and repeat ten times. This exercise re‑engages the middle trapezius and encourages a neutral shoulder position.

Integrating Stretches Into Your Meeting Routine

Set a timer for every 45 minutes of continuous sitting. When the alarm sounds, pause the meeting if possible, or take a brief break to perform one of the stretches. Even a 30‑second pause can reset muscle tension.

If you lead a meeting, consider starting with a quick stretch cue. A simple reminder such as, "Let's all roll our shoulders for a moment," signals that well‑being matters and encourages participation.

For virtual meetings, keep a small stretch guide visible on your screen. A sticky note with the four stretch names can serve as a visual cue without disrupting the flow of conversation.

Additional Tips for Long‑Term Shoulder Comfort

Adjust your workstation so that the top of the monitor is at eye level. This reduces the need to tilt the head forward, which indirectly eases shoulder strain.

Use a headset or speakerphone instead of cradling a phone between ear and shoulder. The weight shift eliminates the extra load on the upper trapezius.

Take a short walk after a particularly long meeting. Walking encourages blood flow to the muscles and helps release built‑up tension.

Finally, stay hydrated. Proper fluid intake supports muscle elasticity and can lessen the perception of stiffness.

By incorporating these stretches and ergonomic habits, you can protect your shoulders from the cumulative stress of long meetings. The effort takes only a few minutes each day, but the payoff includes less pain, better posture, and improved focus for the rest of your workday.

Related reading

AI disclosure: this article was automatically drafted with AI assistance and reviewed before publishing. Written with AI assistance: openai/gpt-oss-120b. It is general information, not professional medical, financial or legal advice.

Step‑by‑Step Guide to Planning a Balanced Week of Meals

Close-up of a woman writing a weekly meal plan at home, promoting a healthy lifestyle.

Creating a weekly menu that feels balanced does not have to be overwhelming. By breaking the process into clear steps, you can save time, reduce waste, and enjoy varied nutrition every day. This guide walks you through the essential tasks, from assessing your needs to shopping efficiently and prepping smartly.

1. Assess Your Nutritional Goals and Schedule

Start by noting any dietary preferences, allergies, or health goals. Do you need more protein, fiber, or calcium? Write down a simple target, such as "include a lean protein at lunch" or "add a vegetable side to dinner." Next, map out your weekly calendar. Identify days with long work hours, evenings out, or travel. Knowing when you have time to cook helps you allocate quick meals for busy nights and more elaborate dishes for relaxed evenings.

2. Choose a Core Food Framework

Use the plate model as a quick reference: half vegetables and fruit, a quarter whole grains, and a quarter protein. Aim for a variety of colors each day to cover different micronutrients. Pick three to four staple proteins—chicken, beans, fish, tofu—and rotate them. Select two whole grains, such as brown rice and quinoa, and keep a list of favorite vegetables and fruits. This framework reduces decision fatigue while keeping meals balanced.

3. Draft a Rough Menu

Write a simple table with days across the top and meals down the side. Fill in breakfast, lunch, dinner, and one or two snacks per day. Keep the structure flexible; you can swap meals between days if needed. Example: Monday breakfast—overnight oats with berries; lunch—chickpea salad; dinner—grilled salmon with quinoa and broccoli. Repeat similar patterns, but vary the protein or vegetable to avoid monotony.

4. Build a Detailed Shopping List

Review your draft menu and list each ingredient once. Group items by store section: produce, dairy, pantry, frozen. Check your pantry for items you already have, such as spices or canned beans, and cross them off. This step prevents duplicate purchases and helps you stay within budget. Aim for fresh produce that can be used in multiple meals, like carrots for a snack, a stir‑fry, and a soup.

5. Schedule Prep Sessions

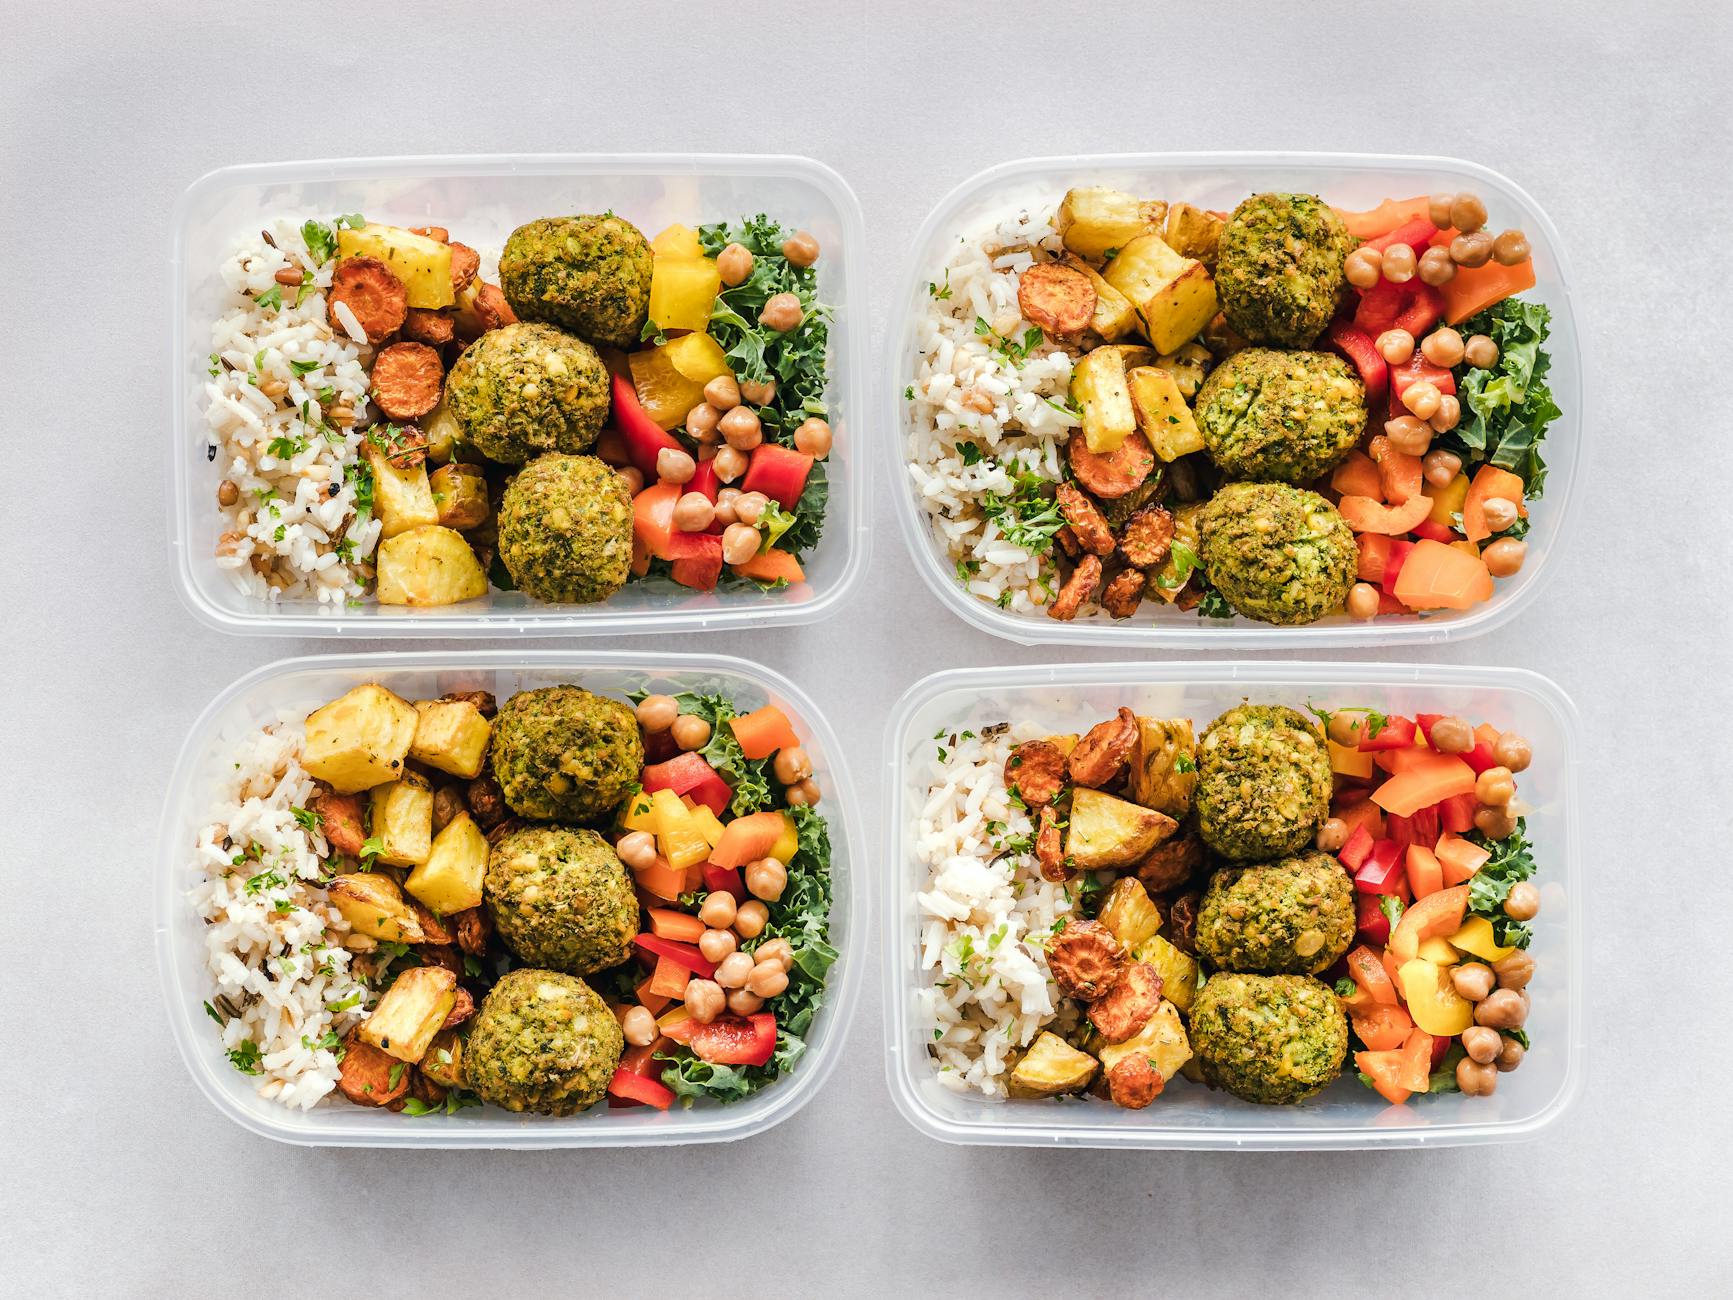
Allocate 1–2 hours on a low‑stress day, often Sunday, for batch cooking. Cook grains in bulk, roast a tray of mixed vegetables, and pre‑portion proteins. Store each component in airtight containers. You can also pre‑chop salad greens, wash berries, and portion nuts for snacks. Having these building blocks ready makes it easy to assemble meals quickly during the week.

6. Assemble Meals Efficiently

When it’s time to eat, combine your pre‑cooked items with fresh elements. A quick lunch might be a grain bowl: add cooked quinoa, roasted veggies, a handful of raw spinach, and a grilled chicken slice. Top with a simple vinaigrette. For dinner, heat a pre‑made sauce, toss in pre‑cooked protein and vegetables, and serve over rice. This method keeps cooking time under 30 minutes on most nights.Remember to keep a few pantry staples on hand for spontaneous meals. Items like canned tomatoes, broth, and dried herbs can turn leftovers into new dishes without extra shopping trips.

7. Review and Adjust

At the end of the week, note what worked and what didn’t. Did you finish all the roasted vegetables? Did a snack feel too heavy? Use these observations to tweak the next week’s plan. Small adjustments, such as swapping a heavy dinner for a lighter soup, improve satisfaction over time.

By following these steps, you create a repeatable system that balances nutrition, variety, and convenience. The effort you invest in planning and prep pays off with less stress, fewer last‑minute takeout orders, and a healthier plate every day.

Related reading

AI disclosure: this article was automatically drafted with AI assistance and reviewed before publishing. Written with AI assistance: openai/gpt-oss-120b. It is general information, not professional medical, financial or legal advice.

Simple Everyday Practices to Lower Stress Naturally

A woman practices yoga meditation outdoors in a serene mountain setting, promoting relaxation and wellness.

Stress is a part of modern life, but small changes can make a big difference. By adding a few easy habits to your routine, you can calm your mind, improve focus, and feel more balanced. Below are practical steps you can start today without needing special equipment or a big time commitment.

Start Your Day with a Breath Reset

Before you reach for your phone, sit up in bed and take three slow, deep breaths. Inhale through the nose for four counts, hold for two, then exhale through the mouth for six counts. This simple pattern signals your nervous system to shift from a fight‑or‑flight mode to a calmer state. Repeating the exercise for just one minute can lower heart rate and set a relaxed tone for the morning.

Move Your Body in Short Bursts

Physical activity releases endorphins, which naturally reduce tension. You don’t need a full workout; a five‑minute stretch, a quick walk around the block, or a set of jumping jacks can break up sedentary periods. Aim to stand, stretch, or move every hour. These micro‑breaks improve circulation, reduce muscle stiffness, and give your brain a brief reset.

Declutter Your Space

Clutter creates visual noise that can increase anxiety. Spend ten minutes each evening tidying a single area—your desk, kitchen counter, or entryway. Put items back where they belong, discard anything you no longer need, and wipe surfaces clean. A tidy environment makes it easier to locate things, reduces decision fatigue, and promotes a sense of control.

Practice Mindful Eating

When you eat, focus on the food rather than scrolling or watching TV. Notice the colors, textures, and flavors. Chew slowly and put your fork down between bites. This practice slows down digestion, helps you recognize fullness cues, and prevents overeating, which can cause physical discomfort and stress.

Limit Information Overload

Constant news alerts and social media updates can overwhelm the mind. Set specific times to check emails and social platforms—perhaps once in the morning and once in the evening. Turn off non‑essential notifications on your phone. By creating boundaries, you protect your mental bandwidth for tasks that truly matter.

Use a Simple Gratitude Routine

Each night, write down three things that went well that day. They can be as small as a tasty cup of coffee or a friendly conversation. This habit trains your brain to notice positive moments, which counteracts the negativity bias that fuels stress. Over time, you’ll notice a shift toward a more optimistic outlook.

Hydrate Consistently

Dehydration can mimic stress symptoms such as irritability and fatigue. Keep a reusable water bottle at your desk and aim for eight cups of water a day. If plain water feels boring, add a slice of lemon or cucumber for flavor. Regular hydration supports brain function and helps you stay calm under pressure.

Create a Wind‑Down Routine

Before bedtime, dim the lights and turn off screens at least thirty minutes prior to sleep. Engage in a calming activity like reading a physical book, gentle stretching, or listening to soft music. A consistent wind‑down signals your body that it’s time to rest, improving sleep quality and reducing next‑day stress.

Connect with Others Briefly

Social interaction buffers stress, even in short bursts. Call a friend, share a joke with a coworker, or send a quick text to a family member. These moments of connection release oxytocin, a hormone that promotes relaxation. Prioritize these micro‑conversations throughout the week.

Set Realistic Goals

Break larger projects into small, achievable tasks. Write down the next actionable step and focus on completing it before moving on. This approach prevents feeling overwhelmed and provides a clear sense of progress. Celebrate each completed step to reinforce motivation.

Incorporating these simple practices does not require major lifestyle changes. Start with one or two that feel most doable, and gradually add more as they become habit. Over weeks, you’ll notice reduced tension, clearer thinking, and a steadier mood. Small, consistent actions are the key to managing everyday stress effectively.

Related reading

AI disclosure: this article was automatically drafted with AI assistance and reviewed before publishing. Written with AI assistance: openai/gpt-oss-120b. It is general information, not professional medical, financial or legal advice.

Practical Ways to Ease Back Pain While Working at a Desk

Emotionless female secretary in casual wear sitting at table in contemporary workplace and tying ponytail during work

Spending eight or more hours at a desk can strain the lower back. The combination of sitting, typing, and staring at a screen creates pressure on the spine and surrounding muscles. Over time, this pressure can lead to stiffness, soreness, and reduced productivity. The good news is that simple adjustments and regular habits can significantly reduce discomfort and protect your back.

Set Up an Ergonomic Workspace

Start by arranging your desk so that your body maintains a neutral posture. Place your monitor at eye level, about an arm’s length away. Your elbows should rest at a 90-degree angle when typing, and your wrists should stay straight. Use a chair that supports the natural curve of your lower back. If your chair lacks lumbar support, add a small cushion or rolled towel.

Keep your feet flat on the floor or on a footrest. Avoid crossing your legs, as this can twist the spine. Adjust the height of your chair so that your knees are slightly lower than your hips. This position reduces pressure on the lumbar region.

Incorporate Movement Breaks

Even short, frequent breaks can prevent muscles from tightening. Set a timer to stand up every 30 minutes. Walk to the water cooler, stretch your arms, or do a quick hallway stroll. These micro‑movements improve circulation and give the spine a chance to reset.

Try the 20‑20‑20 rule for eye strain, and add a back‑friendly twist: after looking at a screen for 20 minutes, look at something 20 feet away for 20 seconds, then stand and stretch for a minute. Simple neck rolls, shoulder shrugs, and seated cat‑cow stretches can release tension without leaving your workstation.

Strengthen Core Muscles

A strong core supports the lower back and reduces the load on spinal discs. Incorporate brief core exercises into your daily routine. Planks, bird‑dogs, and seated leg lifts can be done in a few minutes. Aim for two to three sets of each exercise, holding planks for 20‑30 seconds and performing 10‑12 repetitions of the other moves.

Consistency matters more than intensity. Even a five‑minute core routine each morning can make a noticeable difference after a few weeks. Pair these exercises with regular walking or light cardio to keep overall fitness up.

Adopt Healthy Sitting Habits

Avoid slouching or leaning forward for long periods. Keep your shoulders relaxed and your spine aligned. If you tend to hunch, place a small pillow behind your lower back to remind you to sit upright.

Use a standing desk or a desk converter if possible. Alternate between sitting and standing throughout the day. Start with 15 minutes of standing and gradually increase the time as your body adapts. Remember to keep the monitor at the same height when you stand.

Mind Your Lifestyle Outside Work

What you do after work influences how you feel at your desk. Aim for regular physical activity, such as walking, swimming, or yoga. These activities keep muscles flexible and improve posture.

Maintain a healthy weight to reduce stress on the spine. Hydration also plays a role; well‑hydrated discs are more resilient. Finally, get enough sleep on a supportive mattress. A good night’s rest allows the spine to recover from daily strain.

By combining ergonomic adjustments, frequent movement, core strengthening, and healthy habits, you can manage back soreness and stay productive. Small changes add up, turning a painful desk job into a more comfortable, sustainable experience.

Related reading

AI disclosure: this article was automatically drafted with AI assistance and reviewed before publishing. Written with AI assistance: openai/gpt-oss-120b. It is general information, not professional medical, financial or legal advice.

Practical Ways to Cut Back on Sugary Drinks at Home

A cold, refreshing glass of water on a rustic wooden table, with woven baskets in the background.

Many people enjoy sugary drinks without thinking about the hidden calories and health effects. Cutting back can improve energy levels, support weight management, and reduce the risk of chronic conditions. Below are practical steps you can take to lower your intake without feeling deprived.

Identify Your Current Consumption

Start by tracking what you drink for a week. Write down each beverage, its size, and the time you have it. This simple log reveals patterns you might not notice, such as reaching for soda during work breaks or sipping sweet tea after dinner. Knowing the exact amount helps you set realistic goals.

When you review your log, look for the biggest contributors. A large soda, a flavored coffee, or a sports drink can add hundreds of extra calories. Prioritize cutting the items that appear most often.

Replace Sugary Drinks with Healthier Options

Swap soda for sparkling water with a splash of fruit juice. The fizz satisfies cravings while cutting sugar dramatically. You can also infuse plain water with cucumber, mint, or berries for a refreshing taste.

Unsweetened tea and black coffee are excellent alternatives. If you need a hint of sweetness, add a small amount of honey or a natural sweetener, but keep the quantity low. Gradually reducing the sweetener lets your palate adjust.

For those who miss the creamy texture of milkshakes, blend frozen fruit with plain yogurt or a plant‑based milk. This creates a thick, satisfying drink with natural sugars and protein.

Change Your Environment

Keep sugary drinks out of sight. Store them on a high shelf or in a separate cabinet, and place water bottles where you can see them. Visual cues influence choices, and easy access to water encourages you to reach for it first.

When you shop, stick to the perimeter of the grocery store. This area holds fresh produce, dairy, and beverages with fewer additives. Avoid aisles filled with soda, energy drinks, and flavored waters that contain added sugars.

Consider using a reusable bottle with a built‑in infuser. Having a personalized bottle makes drinking water more enjoyable and reduces the temptation to buy a sugary alternative.

Set Small, Achievable Goals

Instead of quitting all sugary drinks at once, aim to reduce by one serving each week. Replace that serving with water or tea. Celebrate each milestone; small successes build confidence for larger changes.

Use a reminder app or set alarms to prompt you to drink water throughout the day. Consistent hydration reduces cravings for sweet flavors because your body often confuses thirst with hunger.

Track progress in a journal or on a habit‑tracking app. Seeing a streak of days without soda can motivate you to keep the streak going.

Mindful Drinking Practices

Pay attention to why you reach for a sugary drink. Is it habit, stress, or a need for a quick energy boost? Address the underlying trigger with alternative actions, such as a short walk, deep breathing, or a snack of nuts and fruit.

Sip slowly and enjoy the flavor. When you drink mindfully, you notice satisfaction earlier, which can reduce the amount you consume.

Finally, be kind to yourself. Slip‑ups happen, and they do not erase progress. Simply return to your plan and continue moving forward.

By tracking intake, swapping drinks, reshaping your environment, setting incremental goals, and practicing mindfulness, you can cut back on sugary beverages effectively. These steps require no special equipment, just a willingness to make small, consistent changes. Over time, you will likely notice more stable energy, fewer cravings, and a healthier relationship with what you drink.

Related reading

AI disclosure: this article was automatically drafted with AI assistance and reviewed before publishing. Written with AI assistance: openai/gpt-oss-120b. It is general information, not professional medical, financial or legal advice.

Understanding the Sensations of a True Brisk Walking Pace

Serene autumn morning scene in Nancy, France with sunlight filtering through trees.

What Defines a Brisk Walk?

A brisk walk is faster than a casual stroll but slower than a jog. It typically falls between 3.5 and 4.5 miles per hour. At this speed, you feel a light sweat and a steady heartbeat. You can still talk, but sentences become shorter.

Physical Feelings During the Pace

Your legs move with a rhythmic swing. Each step lands softly, then pushes off with a gentle snap. Your arms swing naturally, helping balance your motion. Breathing deepens slightly, but you do not gasp for air. Muscles in your calves, thighs, and hips engage without burning.

Skin temperature rises a few degrees, and you may notice a faint warmth across your chest. Your posture stays upright; shoulders relax and hips align. You feel a mild increase in heart rate, enough to notice but not to cause discomfort.

How to Gauge the Speed Without a Watch

One simple test is the “talk test.” Speak a sentence, then pause. If you can finish the sentence without pausing for breath, you are likely in a brisk zone. Another cue is the “step count.” Aim for about 100 steps per minute. Count your steps for 30 seconds and double the number.

Feel the ground beneath your feet. A brisk walk creates a light, quick tap rather than a heavy thud. Your foot lands closer to the body, reducing the stride length compared to a leisurely walk.

Benefits of Maintaining This Pace

Walking at this speed improves cardiovascular fitness. It strengthens leg muscles and supports joint mobility. Regular brisk walks can help manage weight and boost mood. The activity also encourages better circulation and lung capacity.

Because the effort remains moderate, most people can sustain it for 30 minutes or longer. This duration fits well into daily routines, whether during a lunch break or a morning routine.

Tips for Getting Comfortable

Start with a warm‑up: walk slowly for five minutes, then gradually increase speed. Wear supportive shoes that cushion each step. Choose a flat, safe path to avoid unnecessary strain.

Focus on breathing through the nose and mouth, keeping breaths even. Keep your gaze forward, not down at your feet, to maintain balance. If you feel overly winded, slow down slightly until your breathing steadies.

Track progress with a simple pedometer or phone app. Seeing step counts or distance can motivate you to maintain the brisk pace consistently.

Remember, the goal is a sustainable, enjoyable rhythm. Over time, the sensation of a brisk walk becomes familiar, and you can increase duration or add gentle hills for extra challenge.

Related reading

AI disclosure: this article was automatically drafted with AI assistance and reviewed before publishing. Written with AI assistance: openai/gpt-oss-120b. It is general information, not professional medical, financial or legal advice.

How to Keep Your Eyes Healthy When Using Screens

Casual workspace featuring laptop, coffee cup, and eyeglasses on a white table.

Spending many hours in front of a computer, tablet, or phone is now a normal part of work and leisure. While screens let us stay connected, they also strain the eyes. Simple habits can reduce discomfort and protect vision over the long term. This guide explains practical steps you can take each day to keep your eyes comfortable and healthy while using digital devices.

Adjust Your Display Settings

Start by setting your screen to a comfortable brightness level. The display should be similar to the surrounding light, not brighter than a window on a sunny day. Most devices let you enable automatic brightness, but manual control often works better when you move between rooms.

Next, increase the text size and contrast. Larger fonts reduce the effort needed to focus, and high contrast between text and background makes characters easier to read. Many operating systems include a "high contrast" mode that swaps dark text for light backgrounds or vice versa.

Finally, consider a blue‑light filter. Blue light can disrupt sleep cycles and may increase visual fatigue. You can enable a night‑mode setting that shifts colors toward warmer tones after sunset, or apply a physical screen filter if you prefer a hardware solution.

Follow the 20‑20‑20 Rule

The most effective habit for reducing eye strain is the 20‑20‑20 rule. Every 20 minutes, look away from the screen and focus on an object at least 20 feet away for 20 seconds. This brief pause relaxes the eye muscles that stay contracted while you read up close.

Set a timer or use a phone app to remind you. The pause also gives you a chance to blink more deliberately, which spreads tears across the surface of the eye and prevents dryness.

If you work at a desk, place a small plant or a picture on the wall about 20 feet away. Having a clear target makes it easier to follow the rule without losing focus on your tasks.

Create an Eye‑Friendly Workspace

Lighting plays a big role in visual comfort. Position your screen so that windows are to the side, not directly behind or in front of the monitor. This reduces glare and prevents the eyes from constantly adjusting to bright spots.

Use an anti‑glare screen protector if you cannot control natural light. Desk lamps with adjustable arms let you direct light where you need it without shining directly into your eyes.

Maintain a proper viewing distance. The top of the screen should be at or slightly below eye level, and you should sit about an arm’s length away—roughly 20 to 30 inches. This posture keeps your neck relaxed and places the screen within the eye’s natural focal range.

Keep the air in your room moist. Dry indoor air can evaporate the tear film, leading to irritation. A small humidifier or a bowl of water on a radiator can raise humidity without creating excess moisture.

Take Care of Your Eyes Outside the Screen

Regular eye exams remain essential. An optometrist can detect early signs of strain, prescribe lenses with a blue‑light coating, or suggest specific exercises tailored to your needs.

Stay hydrated throughout the day. Drinking water supports tear production, which keeps the eye surface smooth and clear.

Eat foods rich in omega‑3 fatty acids, lutein, and vitamin C. These nutrients support retinal health and may reduce the risk of age‑related eye conditions.

Finally, give your eyes a break from screens altogether. Spend time outdoors, read a printed book, or practice a hobby that does not involve digital devices. The change of focus and exposure to natural light benefits both vision and overall well‑being.

By adjusting display settings, following the 20‑20‑20 rule, optimizing your workspace, and caring for your eyes beyond the screen, you can enjoy digital life without compromising comfort. Small, consistent actions add up, making screen time a healthier experience for your eyes.

Related reading

AI disclosure: this article was automatically drafted with AI assistance and reviewed before publishing. Written with AI assistance: openai/gpt-oss-120b. It is general information, not professional medical, financial or legal advice.

Balanced Breakfast Habits That Suit Most People

A vibrant Mediterranean breakfast featuring boiled eggs, grilled halloumi, and fresh vegetables on a beautifully patterned plate.

Why Breakfast Matters

Starting the day with food gives the body fuel after a night of fasting. A balanced breakfast can improve focus, mood, and energy levels. It also helps regulate appetite, making it easier to choose healthier options later.

Research shows that people who eat a nutritious morning meal tend to eat less overall. This pattern supports weight management without strict dieting. The key is to include protein, fiber, and healthy fats in each meal.

Core Components of a Good Breakfast

Protein is essential for muscle repair and satiety. Good sources include eggs, Greek yogurt, cottage cheese, tofu, and lean meats. Aim for 15–20 grams of protein each morning.

Fiber slows digestion and keeps blood sugar stable. Whole grains, fruits, and vegetables provide the most fiber. A serving of oatmeal, whole‑grain toast, or a fruit salad works well.

Healthy fats support brain function and keep you feeling full. Nuts, seeds, avocado, and olive oil are easy to add to any breakfast.

Combine these three groups in a simple plate, and you have a foundation that works for most people.

Practical Breakfast Ideas

1. Classic Egg and Veggie Bowl – Scramble two eggs with spinach, tomatoes, and mushrooms. Add a sprinkle of cheese and a side of whole‑grain toast. This dish offers protein, fiber, and healthy fats.

2. Overnight Oats – Mix rolled oats with milk or a plant‑based alternative, Greek yogurt, chia seeds, and berries. Let it sit in the fridge overnight. In the morning, you have a ready‑to‑eat meal rich in fiber and protein.

3. Smoothie Power – Blend a banana, a handful of spinach, protein powder or Greek yogurt, almond butter, and oat milk. The result is a portable breakfast with balanced nutrients.

4. Whole‑Grain Toast with Toppings – Spread avocado on toasted whole‑grain bread, top with sliced boiled egg, and sprinkle with pepper. Add a side of fresh fruit for extra fiber.

5. Cottage Cheese Parfait – Layer cottage cheese with sliced peaches, a drizzle of honey, and a handful of granola. This option provides a high‑protein start with a touch of sweetness.

Tips for Consistency

Plan your meals the night before. Prepare ingredients or assemble containers so you can grab them quickly. Keep breakfast staples stocked: eggs, oats, yogurt, fruit, and nuts.

Limit sugary cereals and pastries. They cause rapid blood‑sugar spikes followed by crashes, which can lead to mid‑morning cravings.

Stay hydrated. A glass of water or herbal tea helps digestion and can improve alertness.

Listen to your body. Some people feel best with a larger meal, while others prefer a light snack. Adjust portions to match your hunger and activity level.

By focusing on protein, fiber, and healthy fats, you can create a breakfast that supports energy, concentration, and overall well‑being. Simple, repeatable meals make it easier to stick with the habit, and the variety keeps it enjoyable.

Related reading

AI disclosure: this article was automatically drafted with AI assistance and reviewed before publishing. Written with AI assistance: openai/gpt-oss-120b. It is general information, not professional medical, financial or legal advice.

Practical Strategies for Returning to Sleep at Night

A serene scene of a woman with afro hair peacefully sleeping in a cozy bedroom.

Waking up in the middle of the night is a common experience. Many people find themselves staring at the ceiling when they should be resting. This disruption often leads to frustration and fatigue the next day. Understanding why this happens can help you manage these moments better. You can use specific techniques to encourage your body to return to a state of rest.

Manage Your Environment and Mindset

The environment in your bedroom plays a significant role in sleep quality. Keep your room cool, dark, and quiet to minimize external disturbances. If you wake up, avoid checking the clock immediately. Looking at the time often triggers anxiety about how much sleep you might lose. This mental stress keeps your brain alert and makes falling back asleep more difficult. Instead, keep your clock turned away from your bed. Focus on your physical sensations rather than the passing minutes.

If you feel restless, try a simple relaxation technique. Progressive muscle relaxation involves tensing and then releasing each muscle group in your body. Start at your toes and move slowly toward your head. This practice shifts your focus from racing thoughts to your physical body. Deep, rhythmic breathing also helps calm the nervous system. Inhale slowly through your nose, hold for a few seconds, and exhale through your mouth. Repeat this cycle until you feel your heart rate slow down.

Limit Stimulation During Wakeful Periods

Resist the urge to reach for your phone or tablet if you wake up. The blue light emitted by screens suppresses melatonin, a hormone that regulates your sleep cycle. Even a quick glance at social media or emails can stimulate your brain. This activity signals to your body that it is time to be awake. Keep all electronic devices out of reach to avoid this temptation. If you must use light, choose a dim, warm-toned lamp rather than overhead lighting.

Avoid engaging in complex tasks or chores during these wakeful periods. If you cannot fall back asleep after twenty minutes, leave the bedroom. Go to another room and engage in a quiet, low-stimulation activity. Read a physical book with dim lighting or listen to soft, instrumental music. Do not choose anything that requires intense concentration or emotional investment. Return to your bed only when you feel a genuine sense of drowsiness. This helps your brain associate the bed with sleep rather than wakefulness.

Establish Consistent Daytime Habits

Your daytime habits influence how well you sleep at night. Exposure to natural sunlight early in the day helps set your internal body clock. Try to spend time outdoors or near a bright window shortly after waking. This practice reinforces your circadian rhythm and improves sleep drive by evening. Regular physical activity also contributes to better rest. Aim for moderate exercise earlier in the day rather than right before bedtime. Intense workouts late at night can increase your core body temperature and heart rate, which may delay sleep onset.

Be mindful of your intake of caffeine and alcohol. Caffeine is a stimulant that can remain in your system for many hours. Limit your consumption to the morning or early afternoon to ensure it does not interfere with your evening rest. While alcohol might make you feel drowsy initially, it often disrupts your sleep architecture later in the night. It can lead to fragmented sleep and frequent awakenings. Opt for herbal tea or water in the hours leading up to your bedtime.

Maintain a Consistent Routine

Consistency is a powerful tool for improving sleep. Try to go to bed and wake up at the same time every day, even on weekends. This regularity trains your body to expect sleep at specific intervals. Create a calming wind-down routine in the hour before you sleep. This might include taking a warm bath, journaling, or practicing light stretching. These activities signal to your brain that the day is ending.

If you experience frequent night awakenings, keep a sleep diary for a week. Note when you wake up and what you did during the day. You might identify patterns, such as late-night snacks or high stress levels, that contribute to your restlessness. Use this information to adjust your habits gradually. Small, incremental changes often yield the best results over time. Patience is essential when adjusting your sleep patterns. Focus on creating a supportive environment and a calm mind to help you drift back to sleep more easily.

Related reading

AI disclosure: this article was automatically drafted with AI assistance and reviewed before publishing. Written with AI assistance: gemini-3.1-flash-lite. It is general information, not professional medical, financial or legal advice.

Building Functional Strength at Home Without Equipment

Man and woman doing pushups while smiling during a workout inside a Mexico City gym.

Building physical strength does not require a gym membership or expensive iron plates. Your own body provides enough resistance to challenge your muscles and improve your fitness. Consistent movement and progressive effort drive physical adaptation over time. By focusing on fundamental movement patterns, you can develop a robust foundation using only the space in your living room.

Mastering Bodyweight Fundamentals

The most effective strength exercises rely on basic human movements. These include pushing, pulling, squatting, and hinging. Pushups serve as the primary tool for upper body strength. They target your chest, shoulders, and triceps. If standard pushups feel too difficult, place your hands on a sturdy chair or a countertop. This incline reduces the load while maintaining proper form. As you gain strength, move your hands to the floor to increase the difficulty.

Squats build strength in your legs and glutes. Stand with your feet shoulder-width apart. Lower your hips as if sitting into an invisible chair. Keep your chest upright and your heels planted firmly on the floor. To increase the challenge, slow down the descent. Taking three seconds to lower your body forces your muscles to work harder throughout the entire range of motion.

Increasing Intensity Through Variation

Once basic movements become easy, you must increase the intensity to continue building strength. This process is known as progressive overload. You do not need more weight to achieve this. Instead, you can change the leverage or the tempo of your exercises. For example, a standard lunge targets the quadriceps effectively. By elevating your back foot on a couch, you transform the movement into a Bulgarian split squat. This variation places more demand on the front leg and improves your balance.

You can also manipulate the tempo to increase time under tension. Perform your repetitions with a deliberate, controlled pace. Pause for a second at the most difficult point of the movement. This technique eliminates momentum and forces your muscles to handle the load without assistance. Focusing on the quality of each repetition yields better results than rushing through a high volume of sloppy movements.

Structuring Your Home Routine

Consistency matters more than the duration of your sessions. Aim for three to four workouts per week. This frequency allows your muscles enough time to recover between sessions. Recovery is when your body repairs tissue and builds new strength. Without adequate rest, your progress will stall. Keep your workouts focused and efficient by grouping exercises into circuits.

Perform one set of squats, followed immediately by a set of pushups. Then, move to a floor-based core exercise like a plank. Rest for sixty seconds after completing the circuit. Repeat this sequence three to five times. This structure keeps your heart rate elevated while providing enough rest for your muscles to perform well on the next set. Track your progress by writing down the number of repetitions you complete each session. Aim to add one or two repetitions to your total each week.

Maintaining Long-Term Progress

Building strength is a gradual process. Avoid the urge to change your routine every week. Stick to the same movements for at least six weeks. This allows your nervous system to become efficient at these patterns. When you perform a movement repeatedly, your brain learns to recruit more muscle fibers. This neurological adaptation is a key component of strength gains.

Listen to your body during every session. Sharp pain is a signal to stop or adjust your form. Muscle soreness is normal, but joint pain indicates that you should modify your approach. Ensure your environment is safe and clear of obstacles. Wear supportive footwear if you find that barefoot training causes discomfort. Stay hydrated and prioritize sleep to support your physical efforts. By focusing on these simple principles, you can build significant strength and improve your overall health from the comfort of your home.

Related reading

AI disclosure: this article was automatically drafted with AI assistance and reviewed before publishing. Written with AI assistance: gemini-3.1-flash-lite. It is general information, not professional medical, financial or legal advice.